Prior to the Edo period (1603-1868) and going back to the earliest known examples, suminagashi decoration of paper was exclusively with black sumi ink. The designs could be pale, were often manipulated to leave areas of open space or the designs were restricted to certain areas of the paper. Often other decorative elements were added including flakes of gold, silver or mica. However, in all cases, the pattern was never primary – the calligraphy, generally poetry, was the focus. Since nothing was ever written or communicated concerning the aesthetics of suminagashi, and production of the papers was controlled by one, then two families throughout most of its history (Narita); we don’t really know what the intent of the producers was, or what the recipients of the paper found interesting or attractive about the patterns. What is apparent from studying the older examples is that additional techniques for manipulating the ink were known and used. In addition to the usual use of alternating brushes for the basic pattern, the dispersant brush can be used, and was used, to expand open areas and simultaneously compress the rings of ink. Furthermore, the entire pattern can be shifted on the water bath to enable focusing on a specific area of the pattern – and the papers indicate that this was actively done. Some of these techniques are evident in papers dating back to the 12th century. However, there also seems to be wide variation in technique over the centuries – whether from varying proficiencies of individuals or varying tastes is not known (discussed in Gallery).
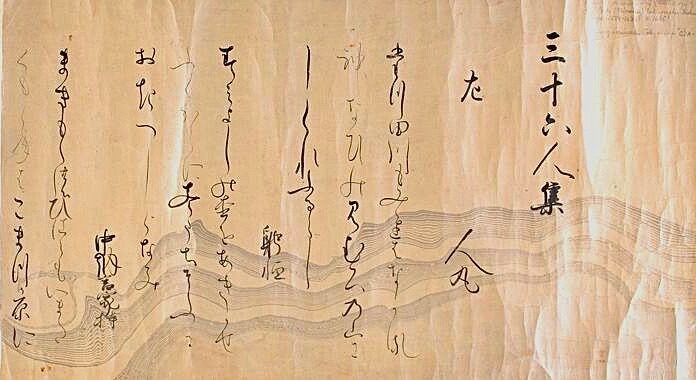
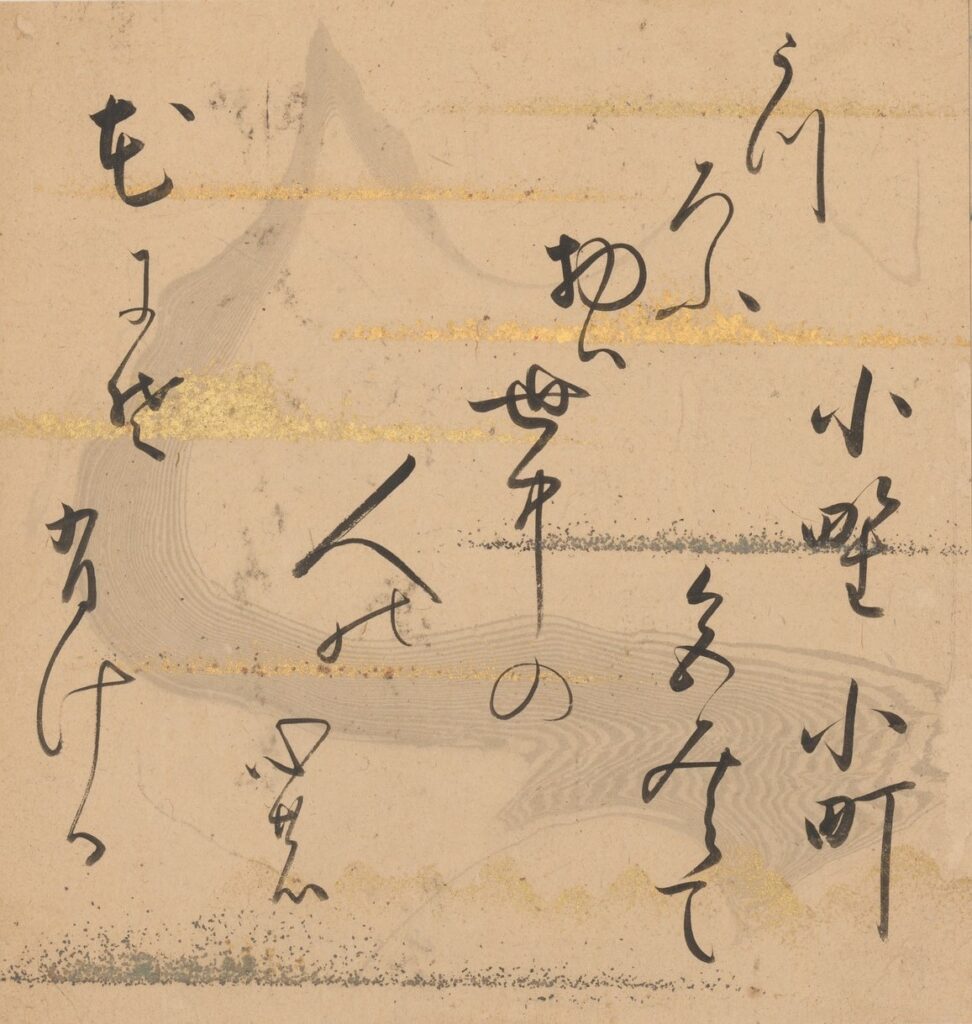
This scroll example from the 17th century (Attributed to Shōkadō Shōjō, Japanese (Sakai 1584 – 1639. Poems of Thirty-six Poets (Sanjūrokunin-shū), Object # 1985.545, Harvard Sackler Museum) shows only a portion of the suminagashi ring pattern along the lower portion of the scroll. The height of the scroll is 10 and 3/4 inches (length not listed but by my estimate the length of the patterned portion of the scroll is in the range of 22 inches) so a large tray would have been required to lay down the ink, expand and shift the pattern and then lay down the paper over the desired area.
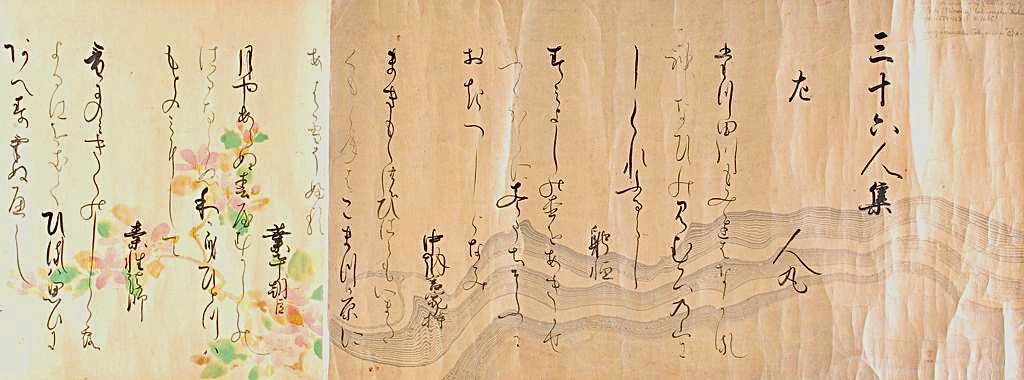
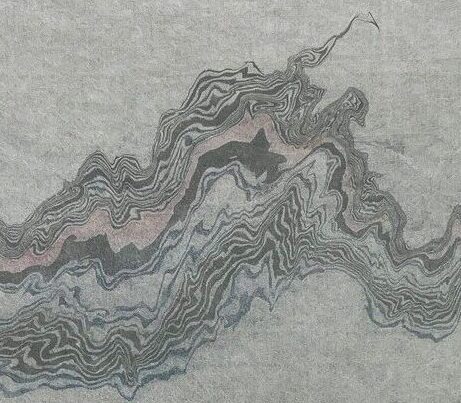
I have cropped the scroll to clarify the suminagashi and below that is my version of the pattern:
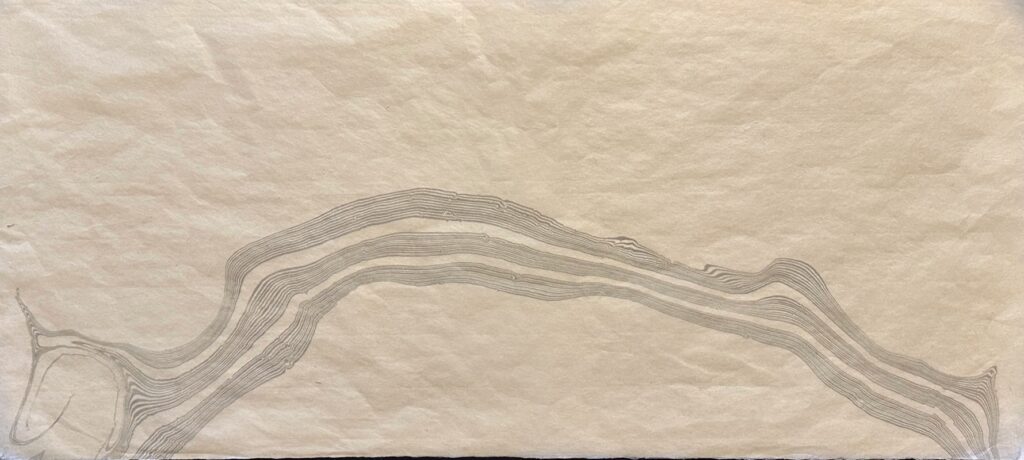
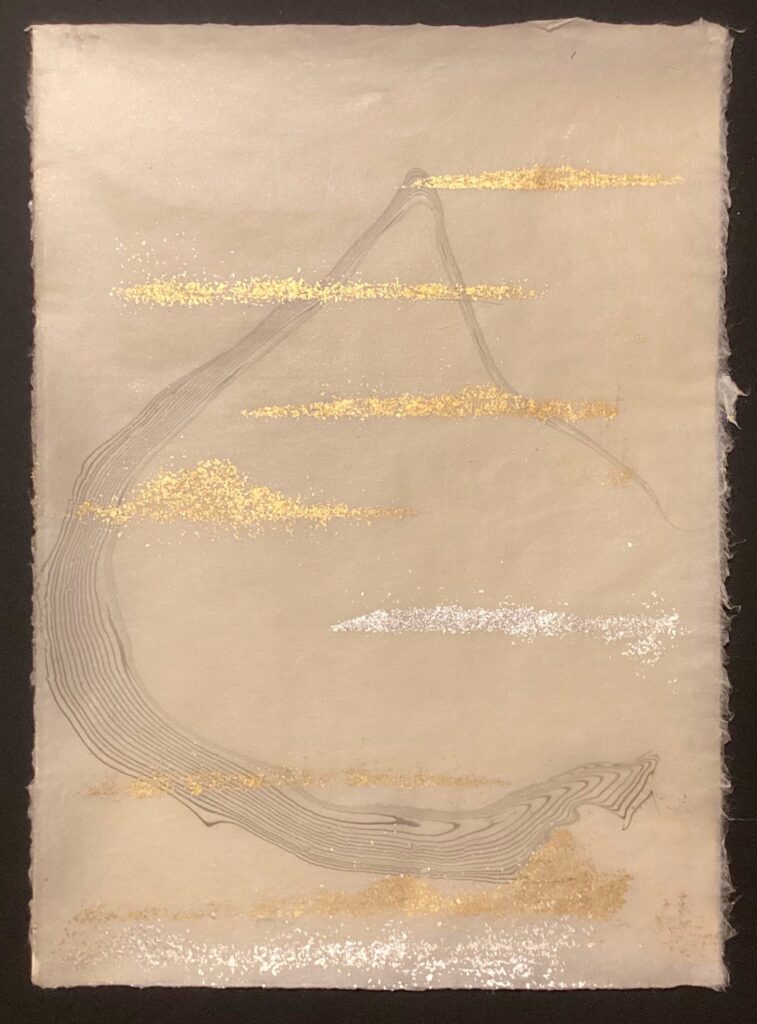
Here is my version of the pattern:
Below is a stop action video demonstrating the process:
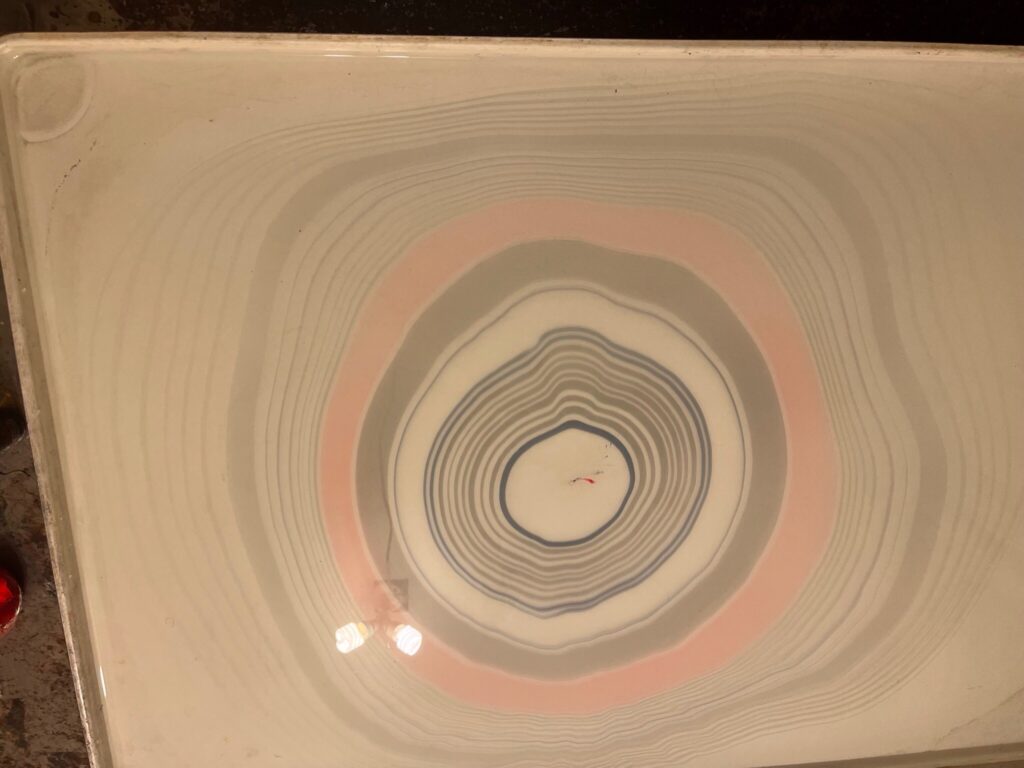
While you can never fully repeat a suminagashi pattern, it is possible to closely approximate it by understanding how the pattern was constructed, counting and following the original sequence of ink ring deposition. The following series will both show how a pattern on a tanzaku was made and will demonstrate the similar appearance that can be achieved by following the above steps.

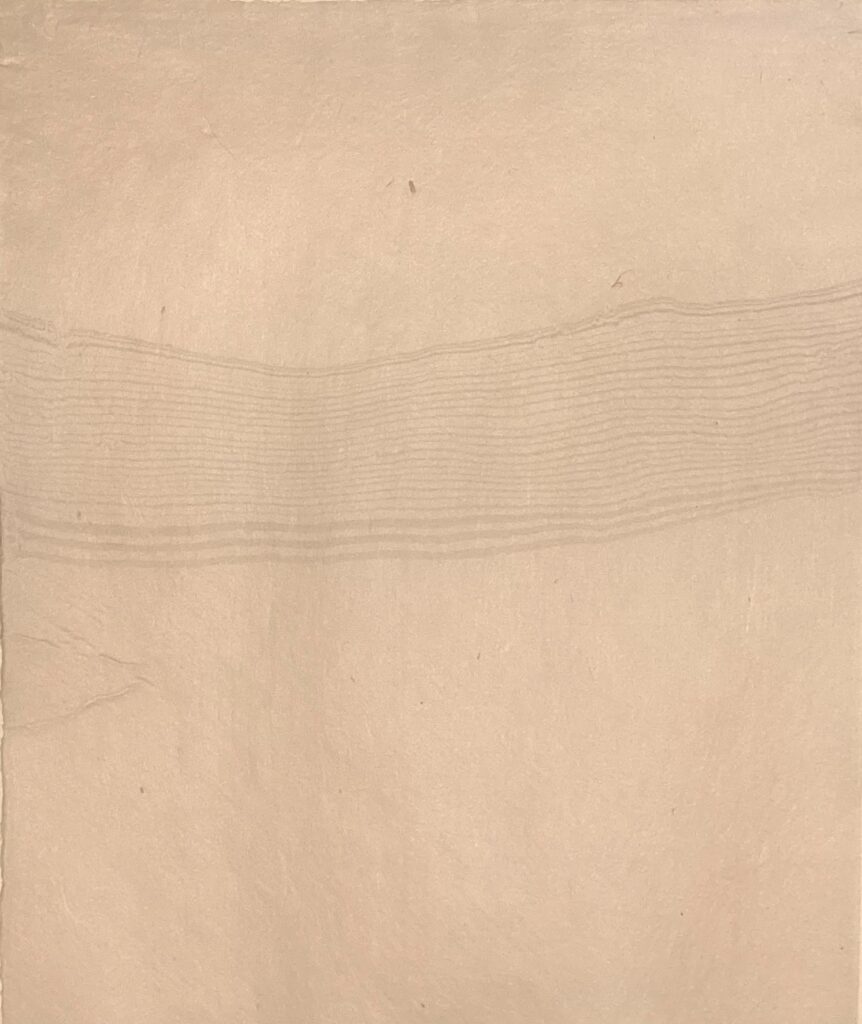
This is an example of a Tanzaku or poetry card, date unknown, possibly early 19th century. Tanzaku are actually fairly large, measuring just over 14 inches in length, 2 1/4 inches in width, so as in the previous example, a rather large tray would be needed to make the pattern. As you can see, the pattern has a large open central area with the suminagashi pattern in the upper and lower areas. The lower pattern is thinner than the upper but that is because these were compressed more during the manipulation of the dispersant after the initial pattern had been laid down.
The following photos show the initial ring pattern:
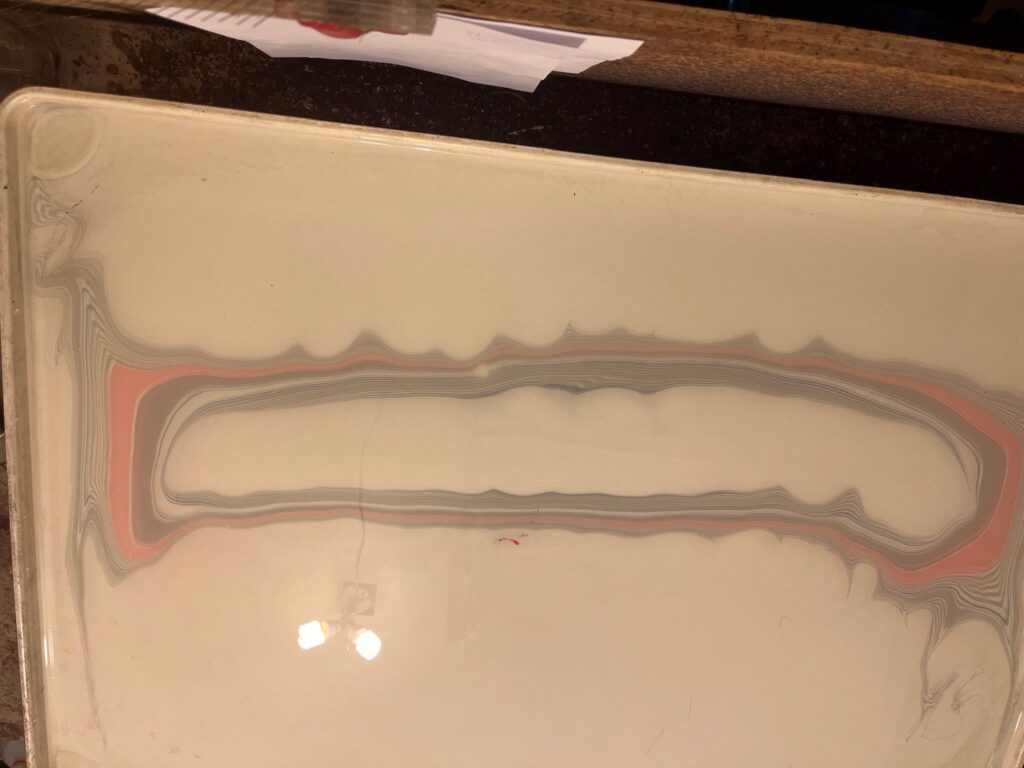
Next is the pattern after further manipulation of the inks, expanding the negative space and compressing the ink, similar to the previous example:
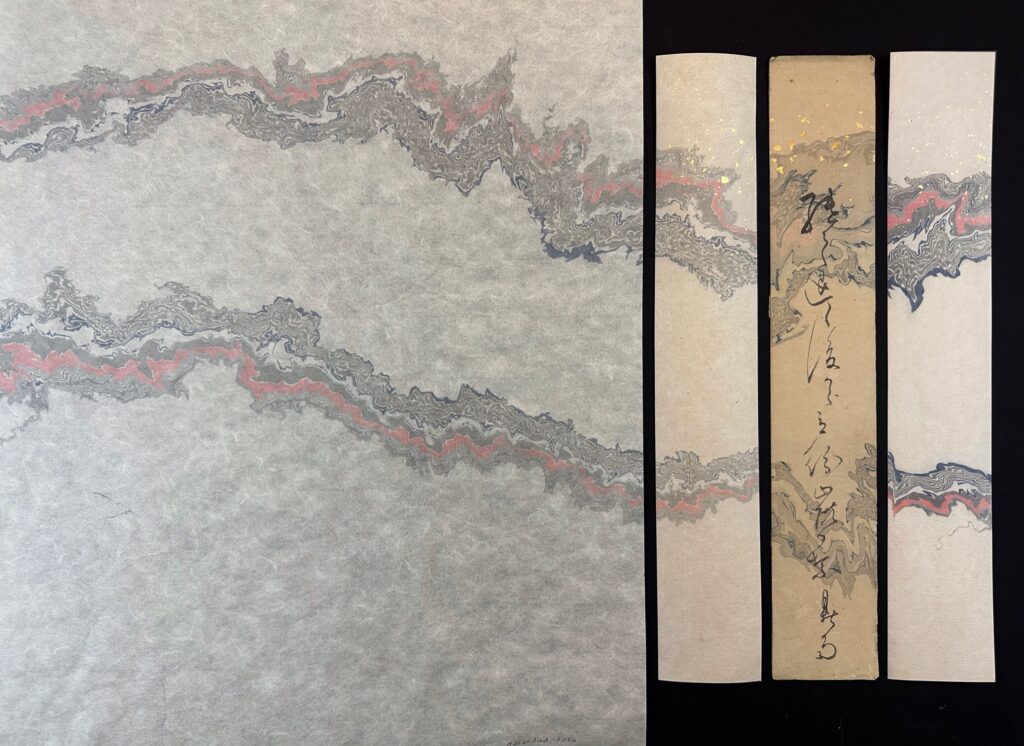
And finally, after some fanning of the pattern to give a more jagged appearance, the paper was laid down, and I cut the left side of the paper to make two tanzaku, here with the original poetry card juxtaposed between the two I made:
While you cannot fully reproduce any pattern, you can come fairly close as this next paper demonstrates.
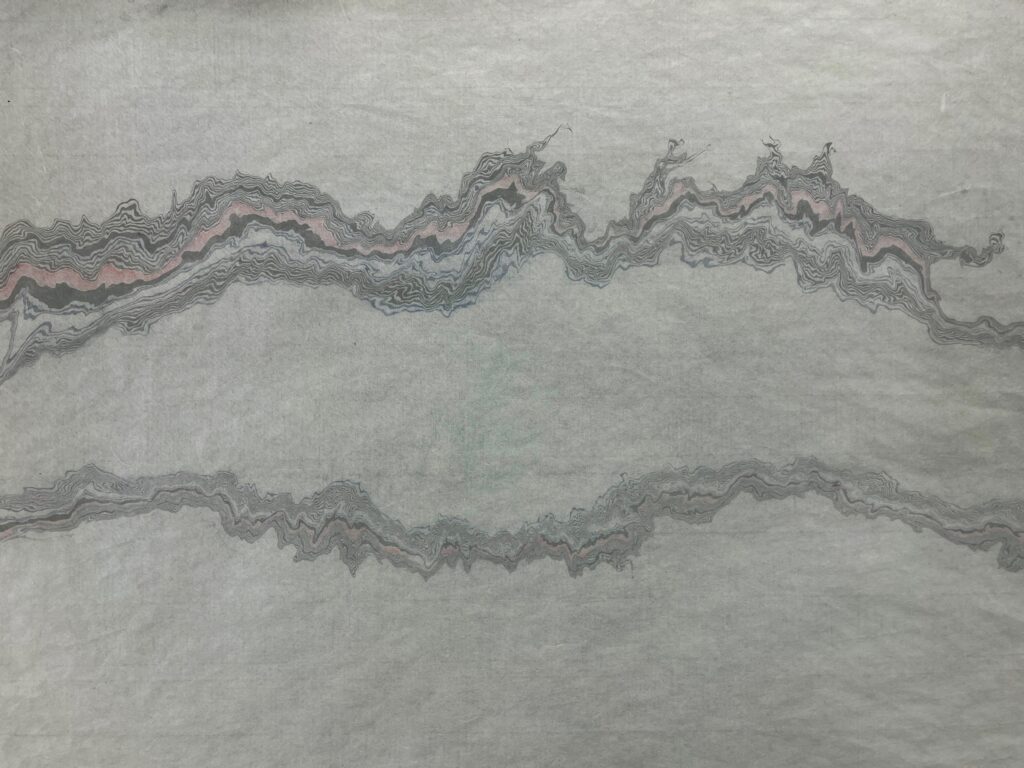
This paper was an attempt to replicate another historical pattern. This was extremely difficult for many reasons: the suminagashi pattern had to be compressed and then manipulated, all within a relatively constrained space to fit on the page, done in mirror image so the pattern would be oriented properly on the paper and then, adding the sunago (gold and silver flake) decoration afterwards. I don’t have the dimensions of the original paper – my paper is certainly larger and the proportions not quite correct. The delicacy and proportions of the original are amazing.
The original paper is here:
My paper is here:
Next is my attempt to replicate a simple pattern, however simple is not easy – it required quite a few attempts to get close to the overall appearance of the pattern: ring sequence and compression, spacing and ink intensity (mine on left and historical comparison on the left)
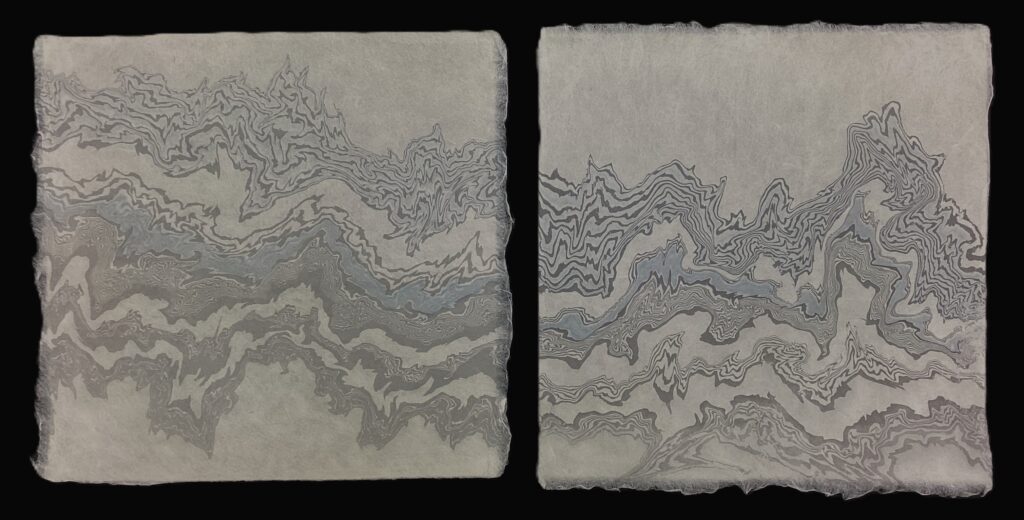
Below are two trials of replicating a complex pattern that I believe is probably 18th century (see Historical Suminagashi Gallery). The pattern consists of 58 ink rings in varying combinations of sumi and indigo, divided into four sections. Difficulties in executing this pattern include the sequence of colors, the amount of paint in each dip of the brush and the varying amount of dispersant between dips, determining the proper concentration of the paints that will later be compressed, estimating enough space to separate the four sections, and then positioning the pattern on the paper. The example on the left was too pale, so I concentrated the paint a little as seen in the example on the right. Spacing between rings was not quite enough in either but perhaps a little better on the left example, but there should be a little more separation of the sections in both examples compared to the original. In neither case is the top section right – I think the sumi rings need to be thicker and with less dispersant space between the rings to enable tighter compression of that particular series of rings. Finally, the right example has better placement on the paper but should be moved up a little higher.
In his guide to suminagashi, Don Guyot wrote: “Traditionally the Turkish marbler is attempting to control the design of the marbled sheet… The suminagashi artist does not practice such control, even to the point of relinquishing control to a large degree…” (Guyot 1990 p 4). Similarly, Anne Chambers wrote: “the suminagashi artist invites his inks to go where they will on the surface of the water, with minimal assistance from the human agent.” (Chambers 1991, p 52). These opinions were shaped by the 20th century approach to suminagashi – chiefly through artists such as Koichi Yamada and Tadao Fukuda, where the entire surface of the bath was covered by ink rings and very little else was done – use of the fan to change the rings from smooth to jagged – but that is about all. However, that is only one aspect of suminagashi. The visual historical record documents a much more varied approach. From the 18th century going back to the 12th century the artists were actively manipulating and arranging the pattern with varying but in some cases a high degree of skill to achieve an effect that would not have been possible using the more passive approaches suggested above. The purpose of my experiments was to highlight this by providing visual demonstrations and examples of what had to be done in order to produce these papers, and thereby, expand our knowledge of suminagashi art and technique.